How to Sanitize Beauty Machines Between Clients in 2026?

Time:2026-09-14 Author:Sienna
0%

In 2026, client confidence depends on more than a spotless treatment room. Every beauty machine should be cleaned, disinfected, and checked between appointments. This guide explains how to sanitize beauty machines between clients with practical, repeatable steps. It focuses on real salon routines, not perfect-looking checklists.

Begin by switching off and unplugging the device when the manufacturer requires it. Remove detachable probes, caps, cords, and product residue. Wipe visible debris with a clean, disposable cloth before applying an appropriate disinfectant. Cleaning comes first. Disinfection cannot work properly through makeup, oil, or dried gel.

Follow the product label exactly. Respect its required contact time. A surface may look wet enough, but it may dry too soon. That mistake is easy to make. Use fresh gloves, clean containers, and separate cloths for used and disinfected parts. Never immerse electrical components unless the manufacturer clearly permits it. Keep porous attachments out of service when they cannot be reliably cleaned.

This article also covers handpieces, treatment beds, storage areas, and commonly missed touchpoints. Think about buttons, cable grips, drawers, and the machine stand. Record the date, product used, and staff initials when your workplace procedure requires documentation. Logs support accountability, although they do not replace careful work.

Professional guidance and manufacturer instructions should always take priority. Equipment designs differ. Some details may need adjustment after inspection. That is worth acknowledging. A rushed routine can appear efficient while leaving contamination behind. Careful sanitation protects clients, supports staff confidence, and strengthens the credibility of every beauty service.
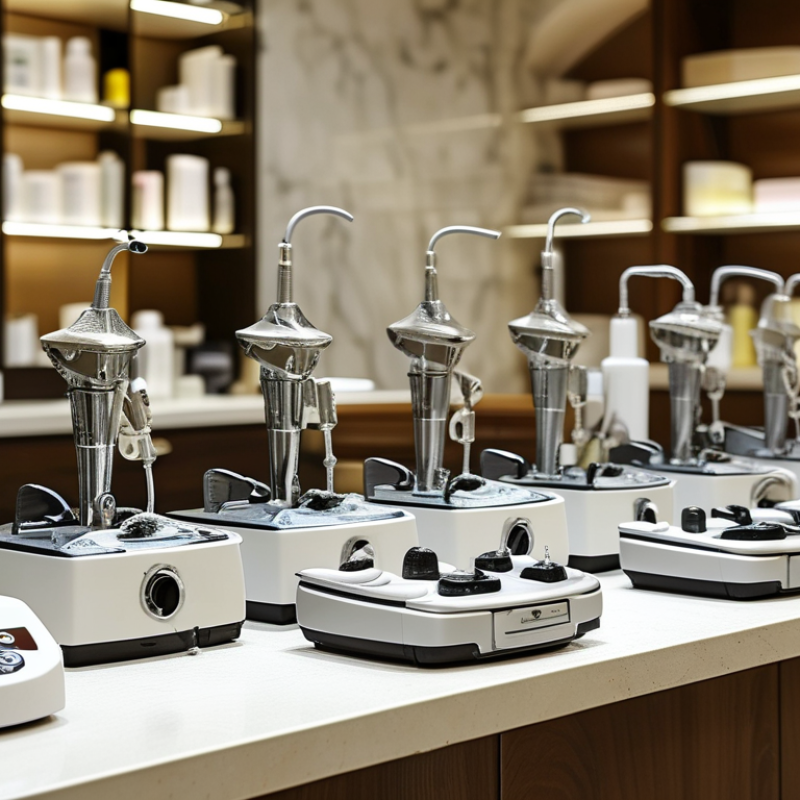
How to Sanitize Beauty Machines Between Clients in 2026?

Types of Beauty Machines and Their Sanitation Requirements

How to Sanitize Beauty Machines Between Clients in 2026?
Types of Beauty Machines and Their Sanitation Requirements

Different beauty machines require different cleaning methods. Non-invasive facial tools, such as ultrasonic spatulas, need cleaning before disinfection. Remove visible residue with a compatible detergent and a lint-free cloth. Follow the disinfectant’s full contact time. A quick wipe is not enough. Keep liquids away from vents, charging ports, and control panels. I check handpieces, cords, buttons, and treatment beds because residue often hides around joints.

Microcurrent, radiofrequency, ultrasound, and LED devices usually have reusable contact surfaces. Clean those surfaces after every client, then use a product approved for the device material. Some equipment cannot tolerate alcohol, abrasive pads, or excessive moisture. The manufacturer’s instructions and local health requirements should guide the process. I record cleaning times when several practitioners share one room. That small habit improves accountability.

Machines used with needles, blades, or skin penetration require stricter controls. Use sterile, single-use tips when required, and place used parts in approved sharps containers immediately. Reusable components may need high-level disinfection or sterilization by trained personnel. Never rely on appearance alone. I once noticed a clean-looking handle still had product trapped beneath its removable ring. It changed my routine. Now I disassemble approved parts, inspect them under bright light, and allow surfaces to dry completely before storage. Mistakes can happen when a room is busy. A written checklist helps, but staff still need practical training and regular review.

Preparing the Work Area, Equipment, and Personal Protective Gear

How to Sanitize Beauty Machines Between Clients in 2026?

Preparing the Work Area, Equipment, and Personal Protective Gear

A clean setup begins before the previous client leaves. I clear used towels, disposable covers, and waste immediately. Then I wash my hands and put on fresh gloves. The work surface should be uncluttered, dry, and easy to inspect. Keep clean accessories away from used items. A small tray can separate both zones.

I disconnect the machine when the instructions require it. Removable parts are cleaned before disinfection, because residue can reduce effectiveness. I use a disinfectant approved for the equipment and follow its label contact time. The surface must stay visibly wet for that period.

I never spray liquid into vents, buttons, or charging ports. Instead, I apply it to a compatible cloth. The machine dries completely before reconnecting.

Personal protective gear depends on the task. Gloves protect my hands, while eye protection helps prevent splashes. An apron protects clothing, and a mask may help during dusty or aerosol-producing procedures.

I replace damaged gloves immediately. Small details matter. I once rushed the drying step and noticed moisture near a connector. That mistake changed my routine.

Now I inspect seams, cords, handpieces, and storage containers under bright light. I also record cleaning time and any equipment fault, then check current local guidance and the manufacturer’s instructions when procedures differ.

Removing Residue Before Disinfection

Before disinfection, remove every visible trace from the beauty machine. Residue can include conductive gel, facial oil, serum, skin flakes, and dust around seams. CDC guidance states that cleaning removes soil and organic material before disinfection. Organic material can reduce disinfectant effectiveness. I wipe detachable surfaces with a compatible cleaning solution and a lint-free cloth. I never force liquid into ports or ventilation gaps. Some devices cannot tolerate immersion. Check the device instructions.

Look closely at handpieces, cables, buttons, and treatment heads. A clean surface should feel dry, not sticky. WHO reports that strong infection-prevention practices can prevent many healthcare-associated infections. CDC data also estimates that about one in 31 hospitalized patients has an infection on any given day. Beauty settings are different, but the principle remains relevant. Visible residue should not be ignored.

Disinfection comes after cleaning. Follow the disinfectant label, including its required wet contact time. A wipe that dries too quickly may not work as intended. My weak point is rushing between appointments. That habit needs correction. I now use a timer and inspect the surface under bright light. If residue remains, I clean it again. CDC, Guideline for Disinfection and Sterilization in Healthcare Facilities; WHO, Global Report on Infection Prevention and Control.

Applying the Correct Disinfectant and Contact Time

How to Sanitize Beauty Machines Between Clients in 2026?

Effective machine sanitation starts with the correct disinfectant, not the strongest product available. Choose a disinfectant approved for your region and compatible with the device’s surfaces. Always read the label and equipment instructions. Some plastics, coatings, and electronic controls can deteriorate when exposed to harsh chemicals.

Unplug the machine when appropriate, then remove visible residue with a clean disposable cloth. Cleaning comes first. Disinfection cannot work reliably through oil, makeup, gel, or skin debris. Apply the disinfectant evenly to the required surfaces, including handpieces, cords, switches, and treatment trays. Keep every surface visibly wet for the stated contact time. Use a timer.

Do not wipe too early.

If the label requires ten minutes, the surface must remain wet for ten minutes. Reapply disinfectant when drying occurs. A quick spray and immediate wipe may look professional, but it can leave microorganisms behind. I have seen busy rooms treat contact time as optional, especially during back-to-back appointments. That habit needs honest review.

Use fresh gloves and a new cloth for each client. Never return a used cloth to the disinfectant container.

Follow the product’s safety directions for ventilation, storage, and rinsing. Some equipment requires a water wipe after disinfection, while other surfaces must remain untouched.

Record cleaning times when your workplace procedure requires documentation. Check seams and narrow joints carefully. They are easy to miss.

Inspecting, Documenting, and Storing Sanitized Machines

After sanitizing a beauty machine, inspect it before serving another client. Check the handpiece, cables, buttons, seams, and protective covers. Look for residue, moisture, cracks, or loose parts. A clean surface is not always a safe surface. Pay special attention to textured areas where product buildup can hide. Follow the equipment instructions and current local health guidance. If anything looks damaged, remove the machine from service until a qualified technician reviews it.

Tips: Use a bright inspection light. Keep a simple sanitation log beside the treatment station. Record the date, time, machine identification, cleaning method, product contact time, and staff initials. Notes should be specific, not vague. “Sanitized” is weak documentation. “Wiped, disinfectant held for five minutes, air-dried” is more useful. I once noticed repeated gaps in our records because staff signed before completing the process. That mistake changed our routine. The person who sanitizes now records the details immediately.

Store the sanitized machine in a clean, dry cabinet or covered container. Keep it away from used linens, waste bins, sinks, and open product jars. Do not coil wet cables tightly. Allow components to dry fully first. Separate clean accessories from items awaiting sanitation. A small labeled tray can prevent accidental mixing. Review stored equipment at the start of each shift. Sometimes dust or condensation appears overnight. That detail is easy to miss. Regular checks make the process more reliable, even when the schedule becomes crowded.

How to Sanitize Beauty Machines Between Clients in 2026? – Inspecting, Documenting, and Storing Sanitized Machines
Stage Timing Inspection or Cleaning Point Required Action Documentation to Keep Storage Requirement Status
1. Disconnect and Prepare Immediately after every client Check the power cord, handpiece, switches, vents, detachable tips, and visible surfaces for product residue, moisture, cracks, or damage. Switch off and unplug the machine when the manufacturer’s instructions require it. Remove detachable accessories and wear appropriate gloves. Do not immerse electrical components unless they are specifically designed for immersion. Record the date, time, operator initials, machine identification number, and any visible defect. Place used accessories in a clearly identified “to be cleaned” container, separate from sanitized items. Required
2. Pre-Clean Before disinfection Look for oil, makeup, skin debris, gel, wax, and other organic material on all product-contact surfaces. Remove debris with a disposable wipe or a clean cloth compatible with the device. Use a neutral detergent or cleaning product approved for the machine. Cleaning must occur before disinfection because residue can reduce disinfectant effectiveness. Note the cleaning product used and whether detachable parts were cleaned separately. Keep cleaned parts on a clean, dry, non-porous surface while preparing the disinfectant. Required
3. Disinfect Between every client Confirm that all client-contact areas, seams, handles, control surfaces, cords, and reusable attachments have been addressed. Apply a disinfectant suitable for the device material and intended use. Follow the product label for concentration, application method, wet contact time, ventilation, and compatibility. Never mix disinfectants or use a product outside its labeled purpose. Log the disinfectant name or active ingredient, prepared concentration if applicable, lot or batch number when available, start time, and required contact time. Keep the surface visibly wet for the full label contact time. Required
4. Rinse When Required After disinfection, if stated on the product label Check whether the disinfectant requires rinsing before the surface contacts skin or before the attachment is returned to service. Use the rinsing method specified by the disinfectant and equipment instructions. Do not rinse if the label specifically states that rinsing is unnecessary for the intended use. Document any required rinse and the person who completed it. Prevent recontamination by using a clean disposable towel or a freshly laundered lint-free cloth. Label-Dependent
5. Dry and Reassemble Before the next client Inspect for remaining moisture, chemical residue, loose parts, damaged seals, sharp edges, or malfunction indicators. Allow the machine and attachments to dry completely. Reassemble only after all parts are clean, dry, and intact. Remove any item that is cracked, corroded, or difficult to clean. Mark the equipment as “ready for use” only after the inspection is passed. Record failed inspections and corrective actions. Do not store damp attachments in closed containers because trapped moisture can support microbial growth. Release Check
6. Inspect Function Daily and after any impact, spill, or repair Test controls, indicators, cables, attachments, cooling or suction functions, and safety features according to the equipment instructions. Remove malfunctioning equipment from service. Attach a visible “Do Not Use” notice and arrange evaluation or repair by a qualified person. Record the fault, date removed from service, corrective action, repair date, and person authorizing return to service. Store failed equipment separately from clean, serviceable equipment. Required
7. Document the Cycle After each completed sanitation cycle Verify that the record is complete, legible, and linked to the correct machine and client-service period. Use a paper or electronic log with a non-editable audit trail where possible. Correct errors with a dated amendment rather than deleting the original entry. Minimum fields: date, time, machine ID, operator, cleaning completed, disinfectant, contact time, inspection result, and corrective action if needed. Protect records from unauthorized access and retain them according to applicable workplace, health, and privacy requirements. Recommended
8. Store Sanitized Attachments After complete drying Confirm that sanitized attachments are visibly clean, dry, undamaged, and clearly separated from used items. Place reusable items in a clean, closed, labeled container or cabinet. Use storage materials that are clean, dry, non-abrasive, and compatible with the equipment. Label the container or storage area with the equipment ID, sanitation status, and date of processing when a tracking system is used. Store in a dry, dust-free, ventilated area away from sinks, splash zones, chemicals, waste, and direct contact with the floor. Required
9. Manage Single-Use Items After one client or one procedure Identify items labeled or designed for single use, including disposable tips, covers, pads, blades, and applicators. Do not clean or reuse single-use items. Dispose of them immediately in the appropriate waste container. Place sharps in a designated puncture-resistant sharps container. Record disposal incidents or supply shortages when they affect safe operation. Keep unused disposables in their original packaging in a clean, dry storage area. Required
10. Review Supplies and Records At least weekly and whenever supplies are replaced Check disinfectant expiration dates, container integrity, label instructions, cleaning tools, gloves, waste containers, and sanitation logs. Remove expired, contaminated, unlabeled, or damaged products. Confirm that staff can access the current equipment instructions and sanitation procedure. Record the review date, reviewer, items discarded or replaced, and training or procedure updates. Store chemicals in their original labeled containers, away from heat, sunlight, incompatible chemicals, and client-accessible areas. Recommended

FAQS

When should I begin cleaning a beauty machine between clients?

Begin before the previous client leaves. Remove used towels, covers, and waste immediately. Wash your hands and wear fresh gloves. Keep the station dry and uncluttered.

Why must visible residue be removed before disinfection?

Oil, makeup, gel, and skin debris can reduce disinfectant effectiveness. Wipe residue away with a fresh disposable cloth. Cleaning comes first. Disinfection needs a clear surface.

How do I choose a suitable disinfectant?

Select a product approved for your region and compatible with the machine. Check the equipment instructions and product label. Stronger chemicals are not always better. Harsh products may damage plastic, coatings, or controls.

How long should the disinfectant remain wet?

Follow the label contact time exactly. Use a timer. The surface must stay visibly wet throughout the period. If it dries early, reapply the disinfectant. Do not wipe too soon.

How can I protect electronic parts during cleaning?

Never spray liquid into vents, buttons, or charging ports. Apply disinfectant to a compatible cloth instead. Disconnect the machine when instructed. Let every component dry completely before reconnecting it.

What protective gear may be needed?

Gloves protect your hands from cleaning chemicals and residue. Eye protection helps prevent splashes. An apron protects clothing. A mask may help during dusty or aerosol-producing procedures. Replace torn gloves immediately.

What parts should I inspect after sanitation?

Use a bright light to check handpieces, cords, buttons, seams, covers, and trays. Look for moisture, cracks, residue, and loose parts. Textured areas can hide buildup. A clean appearance is not enough.

What should a sanitation record include?

Record the date, time, machine identification, cleaning method, contact time, and staff initials. Write specific details. “Sanitized” is too vague. I once signed early, before finishing. That record was unreliable.

How should sanitized machines be stored?

Store the dry machine in a clean cabinet or covered container. Keep it away from used linens, waste bins, sinks, and open jars. Separate clean accessories from items awaiting sanitation. Do not tightly coil wet cables.

Conclusion

Learning how to sanitize beauty machines between clients is essential for maintaining a clean, professional, and safe treatment environment. Different devices may have unique sanitation requirements, so practitioners should first identify which surfaces and components can be cleaned, disinfected, or safely removed. Before beginning, prepare a clear work area, gather appropriate cleaning supplies, and wear suitable personal protective equipment. Any oils, gels, makeup, or other residue should be removed before disinfection, since buildup can reduce the effectiveness of the disinfectant.

After cleaning, apply a suitable disinfectant to the machine according to its intended use and allow the surface to remain visibly wet for the required contact time. Avoid soaking electrical parts or using methods that could damage sensitive components. Once the process is complete, inspect the device for remaining residue, damage, or missed areas. Record the sanitation details when needed, allow the equipment to dry fully, and store it in a clean, protected location so it remains ready for the next client.

Sienna

Sienna

Sienna is a skilled marketing professional with a deep expertise in our company’s core products and services. With a passion for innovation and detail, she plays a pivotal role in crafting insightful blog posts that not only highlight the unique features of our offerings but also provide valuable......